Saturday, July 23, 2011

New Cozies added to My Etsy

Hi ladies
 I have added more Cozies to my Etsy account. Please check them out. I do have a coupon in effect for
20% off  use coupon code luvcricut. This coupon expires July 31st. To shop go to http://www.etsy.com/people/cricutmomof2

 Thank you for stopping by today.

Thursday, July 14, 2011

Rocha Family Tree 2011

 Step 1
 I can now share my special project with you all. My Cousin Denise had contacted me to do a family tree for our family reunion. I have been trying to keep an updated record of my family members. That sure did come in handy. It took me a while to get started on this, because I had no idea how and where to begin. The tree will have 60 names on it. WOW! that's a lot of family members. I was shopping at Costco and I saw a metal tree wall hanging,and that is what I used as my inspiration. I purchased 2-12x24 sheets of dark wood veneer paper.  When I attended Faith in May, I decided to bite the bullet and get started on my project. Thank goodness Teri from Heart2Home was there to help me.

 I used the Heritage Cricut Cartridge to cut the tree. The tree measures 23"x24", this was definitely a 2 person cut. I had to use my trusted Gypsy on this for sure. The tree was cut in 2 separate pieces, seeing the cricut only cuts a max size if 11 1/2" tall. To glue the tree down was definitely hard to do, I had to make sure the seams were as invisible as possible. I applied little dots of glue in each section of the tree, but I worked in a 1 inch section at a time.
Step 2


Step 3
I inked the name labels in different colors for each individual family, so there is definition. Otherwise they would all blend in together.

Step 4
 I added several different sizes of leaves. I inked the edges of each individual leaf. wow that took forever. I also added pictures of my Grand-Parents. I just love the picture of my Grandma (Ama)
She was so beautiful, like old school Hollywood.
Step 5
I added a ribbon with the family name on it. I also added some white doves on my Ama's frame.
Step 6 finished tree

I showed my friend my tree, and she donated the frame and matte to me. So I took it to Michael's to have it all put together for me. I just loved how it came out. I displayed it at our 2011 Rocha Family Reunion.  I think it was a great success. I got a lot of compliments on it.  I hope you like it too.
 It took me about 40 hours from start to finish on this great project. Thank you Denise, for challenging me.


Tuesday, July 5, 2011

Last Vinyl Decal post, for a while at least

  My husband and I loved the T.V. show The Munsters. Since our name is so similar, my husband wanted me to make him a Munsters inspired decal for our tire cover for our RV. This is what I came up with. I used Happy Hauntings Cricut Cartridge, and October 31st Seasonal Cartridge.
This decal measures 11 1/2" tall and 19" wide.

 On another note. I delivered 2 decals I made for some friends this morning, and they sent me pictures of them on their Jeeps. I love how they came out. They worked perfect for them. Thanks Eddie and Becki.

 I wont be here for a while, we are on our way to a 2 week vacation. Having a family reunion in Texas, and heading to the Grand Canyon on the way home. Have a safe and wonderful 2 weeks.


Thanks for stopping by

And

Happy Crafting to you all

Monday, July 4, 2011

Decal for Eddie O.


 A good friend of ours, asked me if I could make him a specific decal. I told him I could try and to send me a picture of what he wanted. So he sent me a picture ( the first one on this post). Wow, I thought, I don't have that image on a cartridge. But I tried to make it anyway. So I used several images and welded them together and this is what  I made. I think its very close. The long teeth believe it or not is the number 1 from Happy Hauntings Cricut Cartridge, The skull is from Indie Art Cartridge,The crack in the skull on top is the lightning bolt from the Cars Cartridge, The Horns are from the Old West Cartridge. I welded all the images together, except for the lightning bolt. It amazes me what you can do with the Gypsy, if you just put you mind to it. Thanks Eddie for challenging me on this decal. I hope you like it.

Sunday, July 3, 2011

Vinyl Decals (part 2)


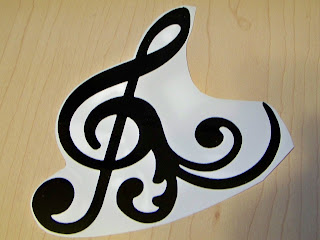
 Here are a few more samples of decals I have made. Some of these have been layered with different colors of vinyl. I am putting these on my sample board for our Crafts Social on September 10th.

Vinyl Decals

  I am totally loving vinyl right now. I have found this absolutely great Clear Transfer tape, Now I can layer much easier. As you can see or not see, the transfer tape is on it in this picture. I made this decal for a very good friend of mine, for her Jeep. I think she is going to love it. I have made others but haven't taken pictures yet, but I will.
I of course used my Gypsy to design and cut it with my E2. I love my Cricut

 I hope everyone has a wonderful and safe 4th of July week-end.

Happy Crafting my friends
Related Posts Plugin for WordPress, Blogger...